The First Cast
A blog about my first time casting.
BLAA BLAA BLAA doesn’t matter part
In 2022 I was staffing NYLT (National Youth Leadership Training) as a troop guide for Scouts. When you staff NYLT you have to create a presentation about leadership. Some topics Are “Finding Your Vision” “Setting Your Goals” “Resolveing Conflicts”. Well for this NYLT course that I was apart of I was incharge of presenting “Setting Your Goals”. Nearing the end of the presentaion there is a quick trivia game you go through to recap what your learned. As the presenter I decided inorder to increase participation in this lame trivia game I will create a personal reward for the patrol that won. This is that story.
Introduction
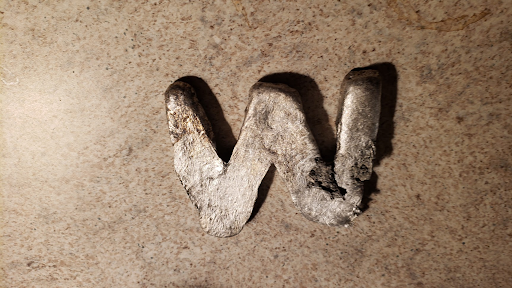
The Item I decided to cast was a Aluminum W. So which ever patrol won the game got the W (get it). The method of casting was lost foam casting. I cut out a W from a trash styrofoam cooler. (There is tons of cool activitys you can do with styrofoam just look up how to make polystyrene from recycleing it.) Well tangent over but this casting method wasnt the best but honestly for how quickly I had to get this done and the low effort I put into the mould it turned out quite nicely. </div>

Picture of the styrofoam cooler with the W etched out.
The Furnace
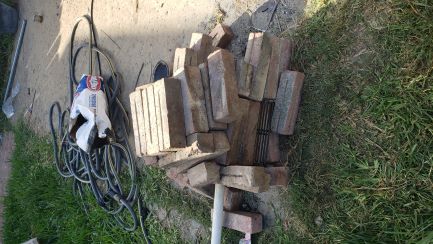
The furnace used for melting the aluminum was made out of gardening bricks from my backyard. I found a camping grill in my garage wich I used to hold the coals but allow the ash to fall through for more efficiant burning. The next part of the furnace is the blower or the air source. You have 0 hope of burning aluminum with coals without a blower. I used a PVC pipe duct taped to my leaf blower as my air source. The PVC then led into the furnace to blow onto the coals. A pictures of the full setup is bellow.


Dont do what I did
I had to go through 3 iterations of a furnace and 3 different bags of charcoal. The biggest thing to make sure of if making a furnace out of garden bricks or firebricks is the importance of closing gaps. Make sure there are 0 gaps besides at the top or you will have a hard time getting the furnace to melting temps for aluminum. Also get big boy pliers or channel locks to hold your crucible.
The Crucible
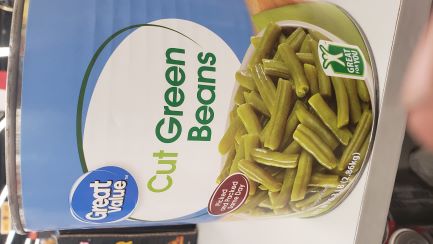
The crucible went through 3 iterations also. The first was a paint can and the second was a can of green beans from kroger. I don’t recommend either of these for casting aluminum. The steel wall was way to thin and actually melted through both times I used the can. I tested both cans with a magnet and were both magnetic. Instead I used a full steel small cooking pot. The handle was aluminum that got removed and melted. See pictures bellow first 2 were the cans. Last one was the final crucible used.
</div>

</div>

Actually Melting and Casting
Aluminum Source
Getting aluminum for casting is pretty easy TON’S of things in life is made with aluminum. Hard drives, Razor scooters, Soda Cans are just a few. I used hard drive aluminum and razor scooter aluminum for my project.
Melting
Melting the aluminum was really fun. Once you actually get the metal molten the entire experience is worth it. Make sure you’re mould is ready and you are ready for the pour. WATCH OUT for zinc gases though if you see yellow or yellow ish smoke that is zinc, and is really not good to breathe in. Just stay out of the smoke and hold your breath you should be fine.
Casting
This step is pretty important once all of the aluminum has been melted and superheated. Remove as much dross and impurity’s in the metal as you can with a spoon or steel ladle. I did not do this step and ended up with my Dross falling into my mold as seen the video of me pouring down bellow. Also for casting sand I used green sand.
https://youtube.com/shorts/n-xR5TgOlkg?feature=share
Conclusion
The project worked great and I learned quite a bit while doing it. Anyone can do this just watch youtube and be safe.
</div>
